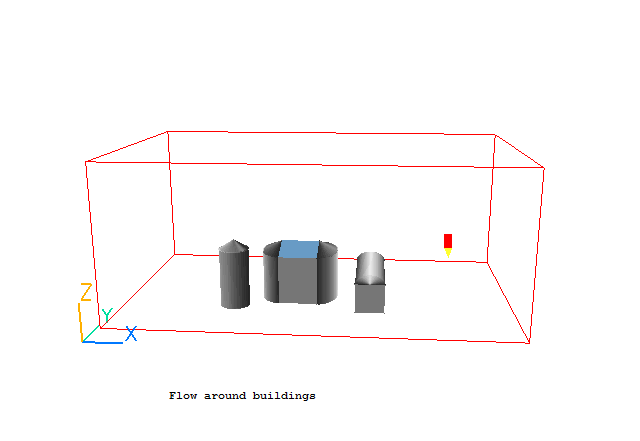
For this workshop you can load and modify case 628 from the core library. The basic case models the isothermal flow of air past a group of buildings. If you want to set the case up from scratch, then please follow the tutorial Flow around Buildings with wind-profile inlet' then return to this point.

The air flow past the buildings is controlled by a WIND object. In the library case (and tutorial), the wind is set to blow from the South-West.
In this tutorial, you will learn how to parameterise the Q1 file to run several wind directions in sequence.
There are three stages to this process:
Any setting or settings in the Q1 can be replaced by parameters. Each parameter must have a unique name, starting and ending with '@', e.g. @param1@.
The parameter file contains the values to be used for each parameter, for each run to be made.
For each run, the parameters in the base Q1 are replaced by the values from the parameter file, the Satellite pre-processor is executed in 'silent' mode, the Earth solver is executed, and all the results are saved as a case.
The tutorial will guide you through each step.
From the system level:
To enter the PHOENICS-VR environment, click on the PHOENICS icon on the desktop, or click on Start, programs, PHOENICS, PHOENICS.
In PHOENICS-VR environment,
Click on 'File', 'Load from Libraries', enter 628 in the Case Number data entry box, and click 'OK'.
Open the Object Management dialog by clicking either the  button on the handset, or the
 ![]() button on the toolbar. The
following dialog should open:
button on the toolbar. The
following dialog should open:
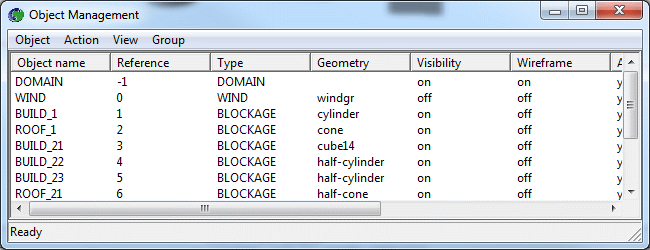
The name of the WIND object is shown as WIND. You will need this information shortly.
To start the parameterisation process, click 'Multi-run' on the Menu Bar, then 'Select Parameters' as shown below.

As there is no saved case as yet, the Editor will ask if you want to save the Q1:
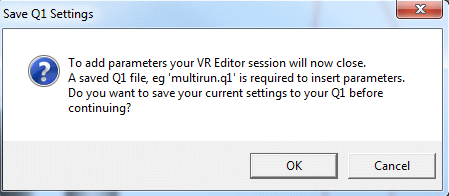
Click 'OK', and save the case as 'multi-run'. The 'Multirun Parameter Settings' dialog will appear:
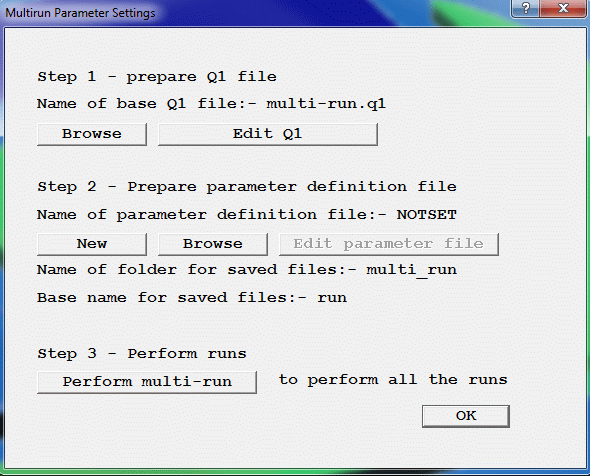
The name of the base Q1 file was already set to 'multi-run' when you saved the case. Click 'Edit Q1' to open the selected file editor (PQ1 Editor or Notepad).
In the file editor scroll down the Q1 until you find the WIND object named WIND. The relevant section should look like this:
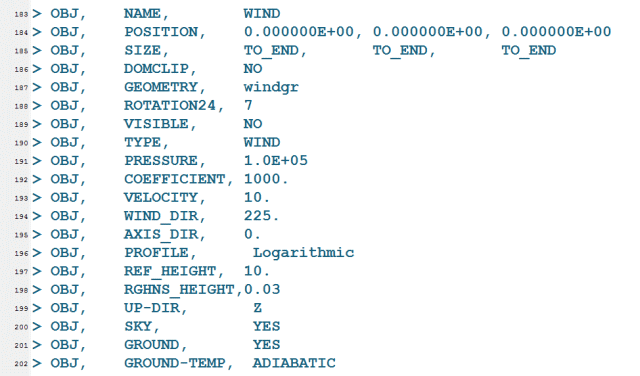
The wind direction is set by the line
OBJ, WIND_DIR, 225.
We will replace the explicit setting 225 (meaning wind from South-West) with a parameter, and then cause the case to be run with four different values of the wind direction.
Replace the string 225. with @winddir@.
To echo the wind direction in the output files RESULT and PHIDA, go back to the top of the file and search for TEXT. You should find this line:
TEXT(Flow around buildings )
Replace the line with this:
TEXT(Flow around buildings for wind @winddir@)
Save the Q1 file and exit the file editor.
At the moment there is no parameter file for this case, so the 'Edit parameter file' button is greyed out. To create a new parameter file, click 'New'. (The 'Browse' button allows you to search for an existing file to use.)

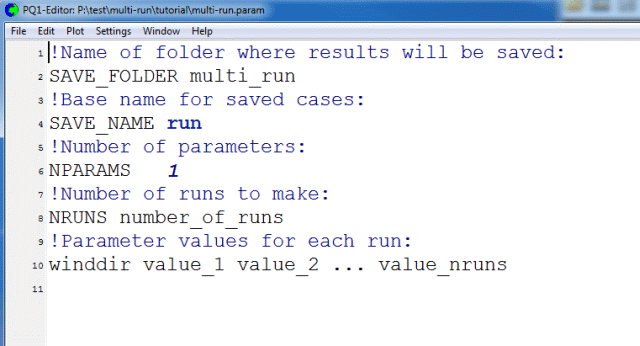
In this file, (as in the Q1 file), the ! character represents the start of a comment, and everything to the right is ignored. The file contains several settings:
The results of each run will be saved as a case into this folder. The default name is set to 'multi_run'. If this folder does not already exist in the current working directory, it will be created. To use the current working directory (not recommended!), change the name to '.'.
The output from each run will be saved into the named folder using the naming convention described here, with the run number added to the save_name, in this case run001, run002 etc. The default setting of 'run' is fine.
This has been determined from a scan of the base Q1. If you add (or remove) parameter settings later, make sure NPARAMS is set to the actual number of parameters in the file.
This sets the number of runs to perform. We wish to run for four wind directions, so replace
NRUNS number_of_runs
with
NRUNS 4
Here we set the value(s) of the parameter(s) to be used for each run.
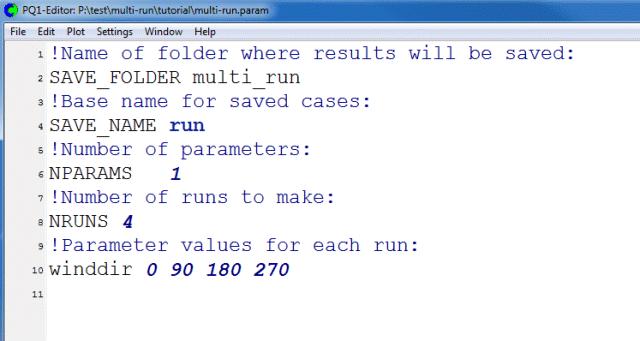
The wind direction is set as an angle in degrees from North. The setting in the original Q1, 225, means that the wind is blowing from the South-West. We want to run with the wind from North, East, South and West, so the required wind direction angles are 0 (from North) 90 (from East), 180 (from South) and 270 (from West).
Replace the line setting winddir with:
winddir 0 90 180 270
You can use a space or comma (,) to separate values. If you later change the number of runs, make sure that NRUNS matches the number of available parameter values.
Once all the settings have been made, save the parameter file and exit the file editor. The settings should look like this:
The library case is set for 200 sweeps, which should take about one minute or so (depending on the speed of your computer), the total time for all four runs will be about four minutes. If you feel this is too long for a tutorial, click 'Edit Q1' to open the Q1 in the file editor. Search for LSWEEP, and replace 200 with, say, 50. This will reduce runtime by a factor of four. The results will not be so well converged, but will at least indicate that the wind direction has indeed changed.
To perform the runs, click 'Perform multi-run'.
You should see the Satellite screen followed by the Earth convergence monitor four times, once for each wind direction.
Once all the runs are finished, click 'OK' to exit the 'Multirun Parameter Settings' dialog.
We can now inspect the solutions in the Viewer.
In the PHOENICS-VR environment, click on 'Run', 'Post processor', then GUI Post processor (VR Viewer).
The results of the four calculations will have been stored in the sub-folder 'multi-run' of the current working directory. You can check (with Windows Explorer) that multi-run contains these files:
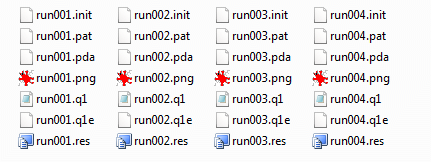
We want to pick up the solution for the first wind direction. The files will be in the sub-folder 'multi_run', and their names will start run001.
On the file names dialog toggle 'No' next to 'User-set file names' to 'Yes', then click 'Select files'. Click 'Browse' next to Q1, and select multi_run\run001.q1, then click 'Open'. The names of other required files will automatically update to be consistent with the chosen Q1.
Click 'OK' to close the 'User file names' dialog, then 'OK' to close the 'File names' dialog.
To view:
To select the plotting variable:
To change the direction of the plotting plane, set the slice direction to X, Y or Z ![]()
To change the position of the plotting plane, move the probe using the probe position
buttons  .
.
Set the plotting plane to Z, select Velocity as the plotting variable and activate display of contours and vectors. The display should look like this:
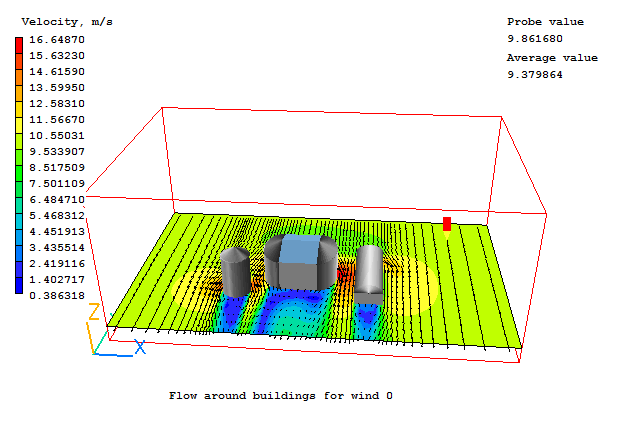
To show the results of the second run, click or press F6 to bring up the 'File names' dialog, then click 'Select files'.

In the top line, change run001.q1 to run002.q1 and click 'Apply'. The second line will automatically update to show run002. (Note that the path name to the left of 'multi-run' will be different on your computer.)

Click 'OK', the 'OK' again. The Viewer will read the next input file, and update the screen to show the new solution:
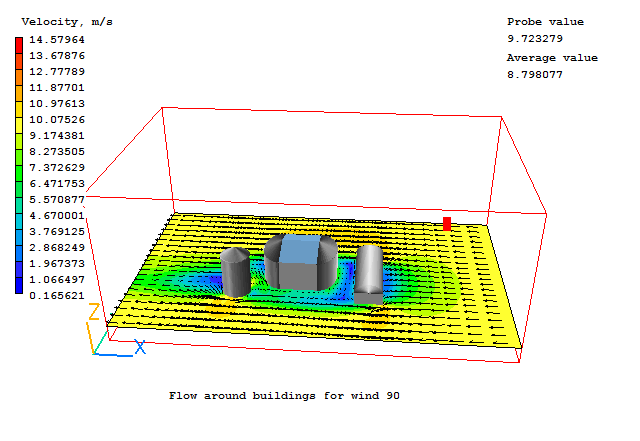
Now repeat the process changing '2' to '3' to get:
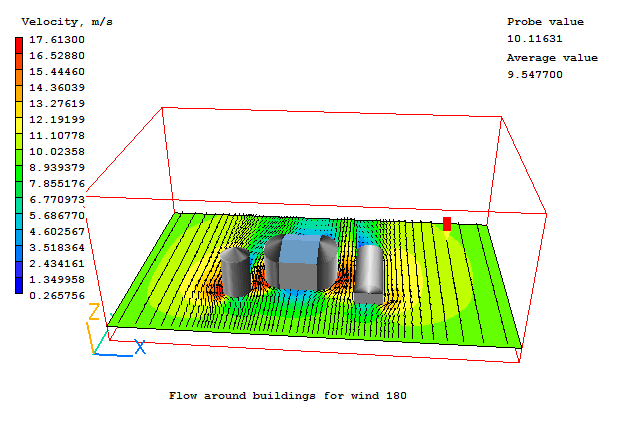
and finally '3' to '4':
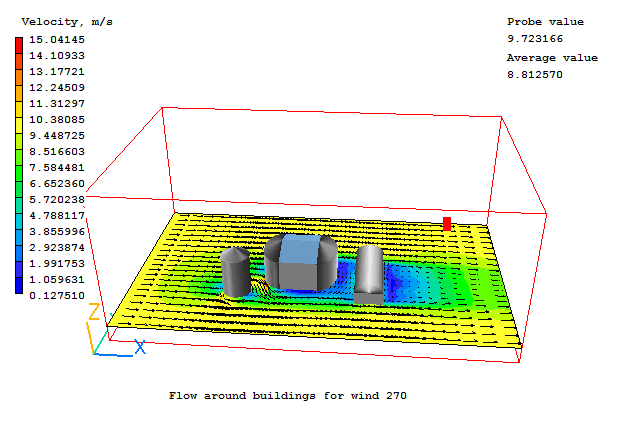
The base Q1, multi-run.q1 and the parameter file multi-run.param are already in 'Save as case' format. To use them again, in VR-Editor click 'Multi Run', then when the 'Multirun Parameter Settings' dialog opens, browse to 'multi-run.q1'. The parameter file will be opened automatically as it follows the naming convention.