AC3D Transition Step 2
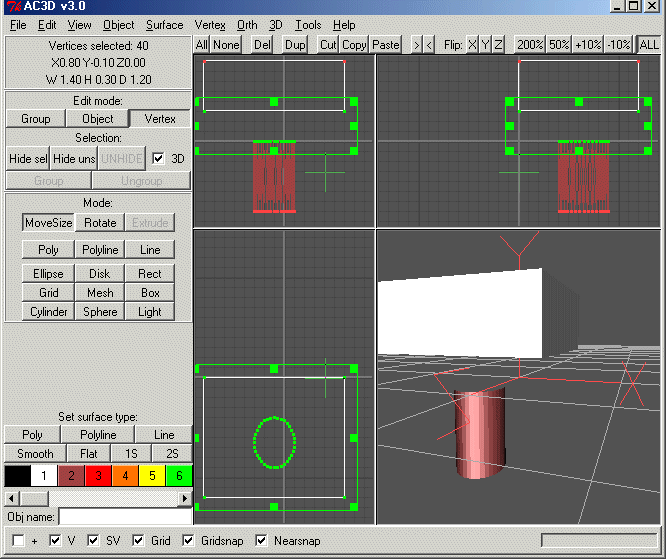
With the vertices selected the window should look like this:

Use the special tool found in the Vertex menu called 'Create surface/object' - this fills in the gap.
Now change to Edit mode = Object, and select the cube and press the 'Hide sel' button at top left. Repeat for the cylinder - you can now only see the transition shape; clearly this needs the ends removed to allow the fluid to flow through it.
Select the transition piece, and use Object->Fragment to split up the piece into single facets; now you need to select the end facets and delete them - the easiest way is to use the mouse to select across the middle of the shape:
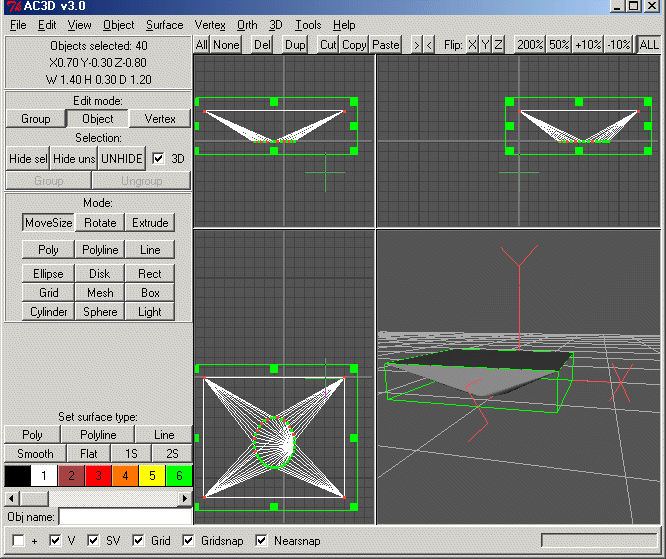 .
.
then use the Hide Sel to hide the facets on the sides. There should now be just 2 facets remaining - a circle and a square. Delete these by selecting them and hitting the delete key (or use the Edit->Cut option). There is nothing left, so press the UNHIDE button.
Again select the facets on the sides of the transition section - sweep across them with the mouse. Use the menu Object->Merge to reunite the transition section. Selecting the transition section and the cylinder, hide them (Hide sel button) then fragment the cube (Object->fragment); as with the transition section hide the sides of the cube and delete the bottom facets (the top face is needed to make a three-dimensional object as required by PHOENICS), then use UNHIDE to see the final shape.
Select the cube sides and merge, then select all (there is an option under Edit to do this or sweep with the mouse to select); use the Object->Optimize vertices option to make the resulting data file smaller and easier to edit in future.
Use the 1S button at lower left to set all surfaces to single-sided. If the 3D window looks like this:
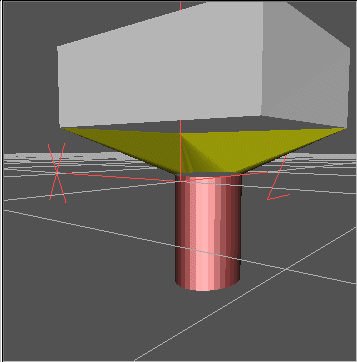
then you will need to select the transition piece, and use menu Surface->flip normal to get the facets into the correct orientation for PHOENICS. This should look like this:
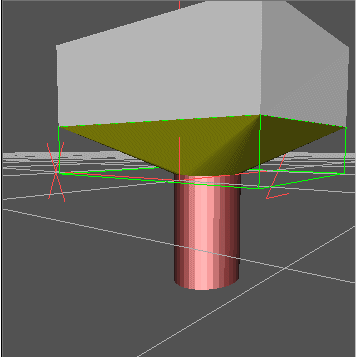
Note that the bottom end of the cylinder is open - PHOENICS requires closed objects. change to Edit mode = Vertex, and select the vertices at the bottom of the cylinder. From the Vertex menu, select Create_ordered surface. Click the 1S button to make the new surface single-sided. If the surface is pointing the wrong way, switch to Object mode, select and hide the cylinder, select the bottom surface and use menu Surface->flip normal.
In Edit mode = Object, select all either by sweeping with the mouse or from Edit -> select all. Merge all the separate components from Object -> Merge. Select the unified object, and use object -> Optimise vertices to reduce the final file size.
Use the File->Export->PHOENICS DAT option to save the shape into the phoenics/d_satell/d_vrgeom directory, then import it into PHOENICS VR:
