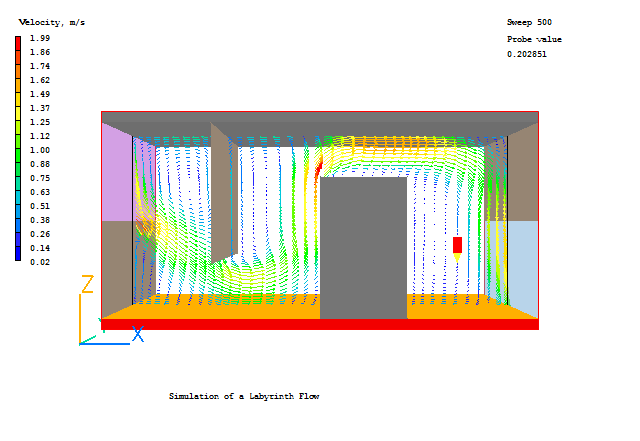
This workshop example shows how to use Transfer objects. Transfer objects allow the flow conditions at the exit of one calculation to be used as the inlet to another, provided that the flow is always from the first domain to the second.
An earlier example set up a 2-dimensional labyrinth flow. The fluid was air and the flow was turbulent with heat exchange.
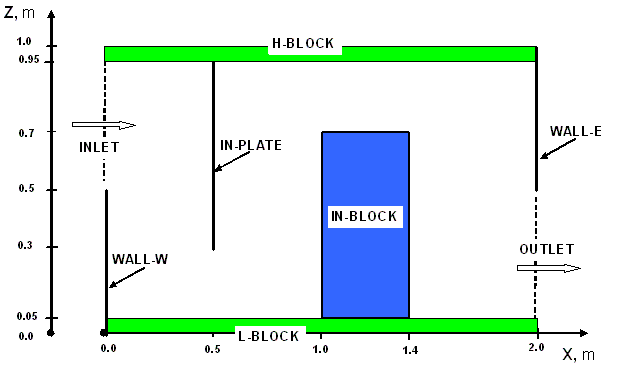
The geometry was as shown in the figure below, but with the vertical dimension 1m and the horizontal dimension 2m :

wherein:
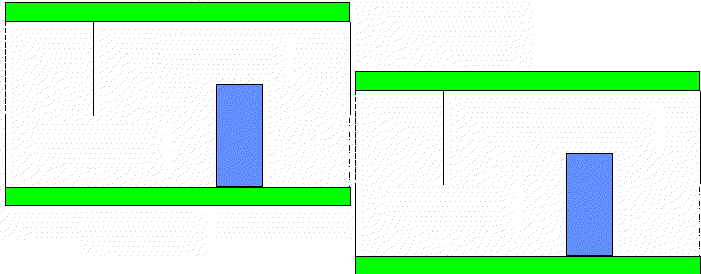
It is now imagined that there is a series of these labyrinths, with the outlet of one feeding the inlet of the next, as shown here:
First activate the PHOENICS Satellite module in VR-Editor mode by either:
If you are uncertain of, or wish to change, your working directory, click on 'Options', 'Change working directory'.
When the Editor starts execution, what it shows on the screen will depend on what happens to be in your working directory. You can disregard this.
In order to make a fresh start;
You are now ready to begin.
If you have recently done the labyrinth tutorial, and have saved the cases as directed, you can click on 'File' , 'Open existing case' and select labyrinth/case2.
If these files are not available, you can load a copy of the labyrinth case from the Library. Click on 'File', 'Load from Library', then 'Browse'. Click the '+' next to 'Tutorial cases' to open that branch, then again for 'General tutorials'.
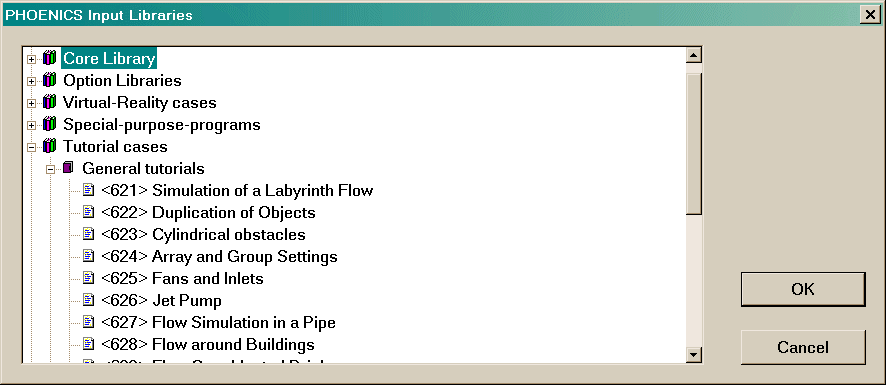
Select case 621 Simulation of a Labyrinth Flow and click 'OK'.
We must make a first run in which the OUTLET object will write out its data at the end of the Solver run.
Modify the OUTLET object:
Double-click the OUTLET object.
Click on 'Attributes'. Change the 'No' next to 'Acts as Export' to 'Yes'. In the file-name entry box, enter 'outflow' (without the ' '). When the solver runs, it will write out the flow conditions at the OUTLET object into the file outflow.pob.
Click on 'OK' to exit the Object Dialogue Box.
In the PHOENICS-VR environment, click on 'Run', 'Solver'(Earth), and click on 'OK' to confirm running Earth.
In the PHOENICS-VR environment, click on 'Run', 'Post processor',then GUI Post processor (VR Viewer) . Click 'OK' on the file names dialog to accept the default files.
To view:
To select the plotting variable:
To change the direction of the plotting plane, set the slice direction to X, Y or Z ![]()
To change the position of the plotting plane, move the probe using the probe position buttons
 .
.
Alternatively, click on the probe icon ![]() on the toolbar or
double-click the probe itself to bring up the Probe Location dialog.
on the toolbar or
double-click the probe itself to bring up the Probe Location dialog.
A typical plot from this case is:
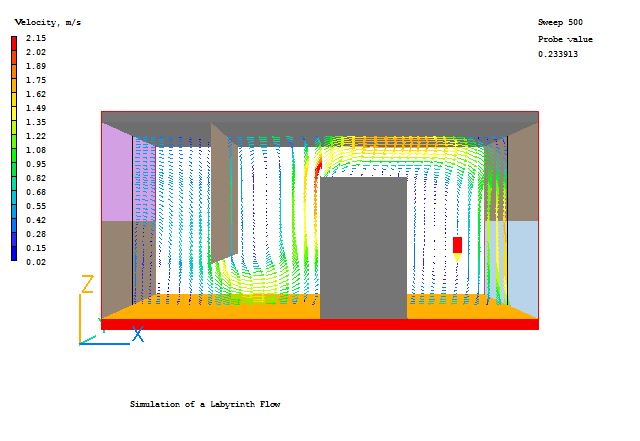
In the PHOENICS-VR environment, click on 'Save as a case', make a new folder called 'TRANSFER ' (e.g.) and save as 'CASE1' (e.g.).
To run the simulation of the next domain, we need to use the data in outflow.pob as the inlet boundary condition.
Double-click on the INLET object.
Click on 'Attributes'. Change the 'No' next to 'Acts as Import' to 'Yes'. In the file-name entry box, enter 'outflow' (without the ' '). Notice that all the other attribute settings have gone, as when the solver runs, it will read the flow conditions at the INLET object from the file outflow.pob.
Click 'OK' to close the Attributes dialog then again to close the Specification dialog.
Double-click the OUTLET object and open the Attributes dialog. Change the name of the export file from outflow.pob to outflow2.pob. If we do not do this, we will overwrite the original outflow.pob from the first run.
In the PHOENICS-VR environment, click on 'Run', 'Solver'(Earth), and click on 'OK' to confirm running Earth.
Run the Viewer and check the flow field. Do the vectors at the inlet look anything like the vectors at the outlet of the first run? Check the mass and energy balances (for a reminder of how to do this, click here). Do the source values at the INLET in this run match the sink values at the OUTLET in the first run?
